Glow on: How to apply fake tan perfectly, in five simple steps

image: @rosiehw
While many of us would ordinarily be thinking about jetting off on holiday, that just isn’t an option this summer. But that doesn’t mean you should skip out on your tan altogether. Team Hood are passionate believers in safe tanning—and that means faking it from the bottle. And now, with restrictions starting to gradually ease, now’s the time to perfect your fake tan application.
We should all be wearing SPF30 (at least - SPF50 is preferred if you can) on our faces and any areas of exposed skin, every day - yes, even on cloudy days, even in Scotland! - so stripping off to sunbathe makes no sense if you want to protect your skin, and your long-term health. Faking your tan is the best bet all round, for an even colour and a sunkissed glow, without hours sat outside risking sun damage or sunburn.
If you’re a fake-tan novice, however, there’s no need to fret. Simply follow our easy step-by-step guide to achieve your best-ever golden glow this season - so good that nobody will know it’s not real!
Step One
The first step is to prepare your skin for the tan application, to ensure an even coverage and a smooth finish. Take a warm shower, where you should do any hair removal, and then use a body exfoliator to scrub away patches of dry skin, creating a smooth canvas for your tan.
Post-shower, apply a lightly hydrating body lotion to moisturise and prep the skin - pay extra attention to dry patches like knees, elbows and ankles. Leave the moisturiser to sink into the skin for around half an hour, so that your skin is no longer tacky to the touch. This will stop the moisturiser from interfering with your chosen tan.
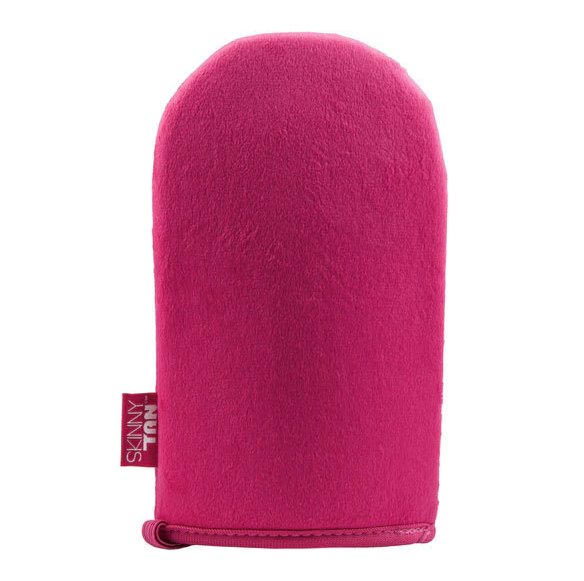
When the skin is ready, prepare your area for tanning and make sure that you have a clean, dry tanning mitt to hand. If you’re planning to hand your face, hands and feet, apply a thin layer of vaseline around your ears and hairline, and across your nails, to prevent the tan from staining.
Step Two
Apply your tan to your mitt - it’s best to choose a tan with a guide colour if you’re a tanning novice, to make sure that you don’t end up with streaks, and we love a mousse for easy application. Begin at the ankles, which will stop the tan from creasing as it dries. Use long, sweeping motions up the body, and remember to buff into the skin using small circular motions in tricky areas, such as the knees and elbows.
Don’t do your face, hands or feet yet, and ask your partner or housemate to help with the back, to make sure you get an even coverage.

image: @rosiehw
Step Three
Once you have applied the tan to your body, it’s time to tan the hands and feet. Don’t apply any additional product to your tanning mitt - simply use whatever is left on the mitt and buff it into the hands and feet for a natural, soft effect. Take particular care around the heels and knuckles, and remember that you should never tan the palms of your hands or soles of your feet, if you want your tan to look natural. Buff the insides of your arms and your wrists to ensure a natural, blurred finish without any harsh lines.
Step Four
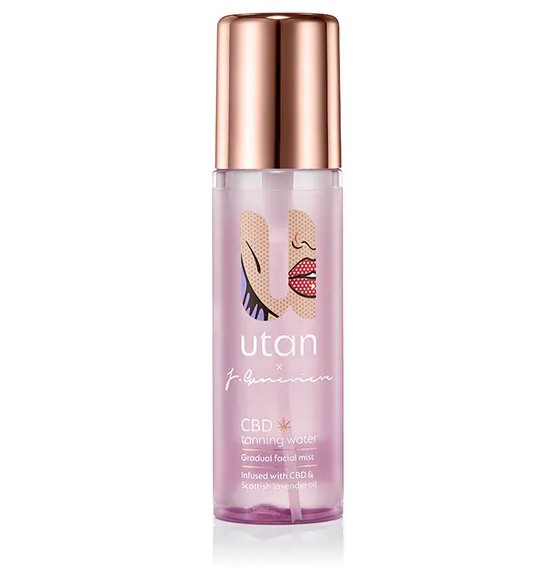
Apply tan to the face! We love using a dedicated facial tanner, with a few drops mixed into your moisturiser for best results, or you could try Scottish blogger Jamie Genevieve’s widely-renowned facial tanning mist with UTAN, to spritz your glow over lightly. Remember to buff it all in properly!
Step Five
Wash your hands, and leave your tan to dry before getting dressed. After that, look after your tan - exfoliate with every shower, to fade it evenly, apply moisturiser or even a gradual tanning lotion daily to help prolong the colour, and remember that your hands will need more frequent reapplication of tan, as regular handwashing will fade the colour faster. Now enjoy your golden glow!